

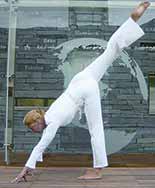


This posture brings flexion and extension to the entire length of the spine.
 Vyaghrasana is especially beneficial for those people who sit a lot as it strengthens the lower back, abdominal and gluteus maximus and medius muscles, which are all important for good posture.
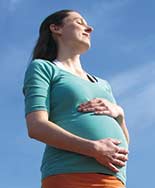
It is also good for women after childbirth as it tones the female reproductive organs. On the mental and emotional level it brings a stronger sense of willpower and determination and the ability to be more flexible in facing life’s challenges is nurtured. On the energetic level your awareness is drawn first to Swadhistana chakra, rising to Manipura (around the level of the naval), Vishuddhi (at the throat) and Ajna (between the brows.
Contra-indications
You shouldn’t practice this posture if you are suffering from a hiatus hernia and you should avoid this posture if you have serious problems with your wrist or knee joints. If you have sciatica you should avoid just the first part of the posture where the knee and spine are flexed.
Body preparations
It is really important when doing this posture that you do not over extend the raised leg and hip, causing the body to twist. Having a partner to guide you until you become more aware of the height of the raised leg will help. To prepare for this posture you will need to strengthen the gluteus maximus and medius muscles.
How to do this posture?
|
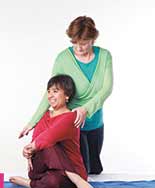
Step 1 Adopt the cat posture (make sure to have the knees hip-width apart, hands flat on the floor with the wrists and elbow under the shoulders, top of feet flat on floor, head looking towards the floor). Ensure you have engaged your core stability muscles. Step 2 Inhale and then as you exhale bring your left knee towards the forehead. Contract your abdominal muscles and arch your upper back. Step 3 On the next inhalation stretch your left leg back and feel an extension throughout the entire body. Keep the hips level as you raise the left leg and look forward. Take your focus to elongating the spine and the raised leg. Step 4 Alternate between these two positions following the rhythm of your breath. Be aware of the position of your hips and try to keep them level. Perhaps being able to look in a mirror would help you at first. The body soon gets to know which is the correct position when you have done it a few times correctly. Step 5 After completed a few rounds of the movement with the left leg, return to the cat position (on all fours). Take a small break before repeating on the other side by taking the weight back towards the heels, separating the knees a little and relaxing your body down over the thighs. Keep the arms stretched out in front of you, and, if it's comfortable, place the forehead on the floor or a cushion. Then simply rotate the wrists a few times in either direction. When you are ready push back up onto your hands and knees and begin with the right leg. |
Watch as the cat become the tiger in this posture! Enjoy the increased sense of willpower and determination it brings! It also helps us to be even more flexible and face what life throws at us!
 Watch the Tiger pose
If you'd like to do the tiger as part of a class - why not check out this video from Dru Yoga Online.